
One important customer satisfaction metrics is the Net Promoter Score (NPS).
The limitations of the NPS survey have been written about at length (as have truths) but the fact is that research, and our real-world usage for ourselves and clients, shows NPS correlates very strongly to growth.
If you’re reading this, you’re either conducting surveys regularly and see the value or looking to get started. Since one of the biggest drawback to an NPS survey is that it isn’t prescriptive, we’ve included additional feedback loops in the automated process to help you identify a concrete goal–enabling you to do whatever it takes to make the necessary improvements to raise that score.
Using the steps outlined in the post you’ll be able to:
- Easily re-measure NPS over time. (Monthly)
- Use HubSpot’s email performance report as your NPS report.
- Collect feedback to understand why someone gave you a particular score.
- Collect testimonials from NPS Promoters automatically.
We’ve even made our HubSpot NPS code available to you so you can add it to your HubSpot portal.
What Is NPS?
First, let’s start with:
- What is NPS?
- What does NPS stand for?
NPS, in customer relationship or customer management, stands for Net Promoter Score. Net Promoter Score is a customer feedback score used to measure customer happiness and loyalty.
Collecting an NPS score from your customers serves many purposes but one of the main reasons for continually collecting this data is to ensure that your current clients will repurchase from you.
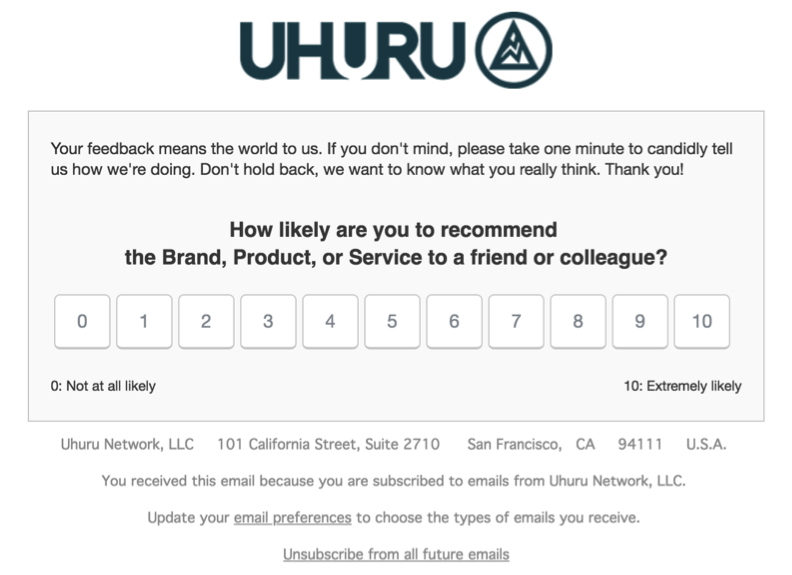
Asking a simple feedback question like, “How likely are you to recommend our company to a friend or colleague?” allows your customers to rank the likelihood from 0 (not likely) to 10 (extremely likely).
NPS Score
Customers’ NPS scores are grouped into three types:
- 0-6 are considered Detractors—unhappy customers who are likely to churn in the next 30-90 days.
- 7-8 are considered Neutrals—no strong feelings one way or the other.
- 9-10 are considered Promoters—your super fans who are eager to help spread the word.
What is a good net promoter score?
A high overall NPS score indicates strong customer loyalty. NPS scores can range from –100 to +100 and is calculated as % of Promoters – % of Detractors.
If you’re just starting your NPS feedback process, it’s common that the initial survey produces a low score. Don’t be surprised. The key takeaway comes from using the feedback to make improvements. You want your NPS to trend upward with each survey. You also may be wondering, “What is a good Net Promoter Score?” That really depends on your company and the average NPS score in which customers repurchase.
If you’re part of a SaaS company with an average NPS score of 7 but have a high customer retention rate, that might determine that your customer will repurchase but they won’t necessarily tell their friends about your software. Once you have some data that’s been collected over time and are keeping customer feedback top of mind, you’ll understand how NPS scores have a direct impact on your business.
With more than 80% of happy customers willing to provide recommendations, NPS is a vital part of your company’s ability to continually improve and keep customer retention high.
Now, let’s dive into the HubSpot setup.
IMPORTANT: This guide uses HubSpot’s most recent dashboard menu (updated October 11, 2018).
How to Set Up an NPS Survey with HubSpot
While you can just use simple survey tools to ask your customers the NPS question, you’d be missing out on a fully automated system built to collect, analyze quantitative and qualitative results, collect testimonials, and activate a conversation to nurture the negative customers while engaging the positive ones.
HubSpot allows you to do that and we’re going to show you the steps.
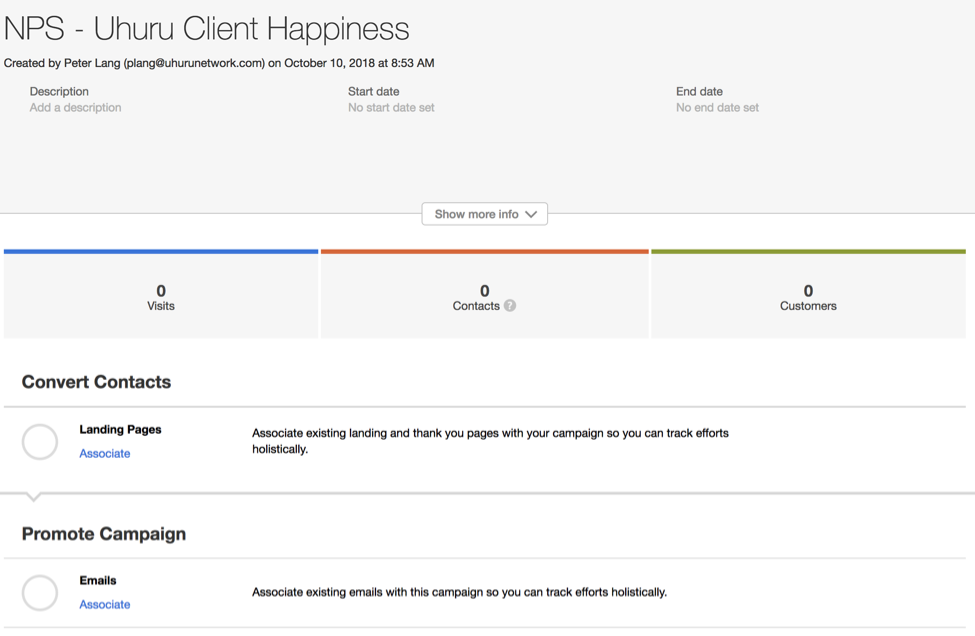
Step 1: Create a HubSpot NPS Campaign
Typically companies aren’t great at organizing and documenting internal processes. Make sure you start by creating a HubSpot campaign and attaching your NPS campaign assets.
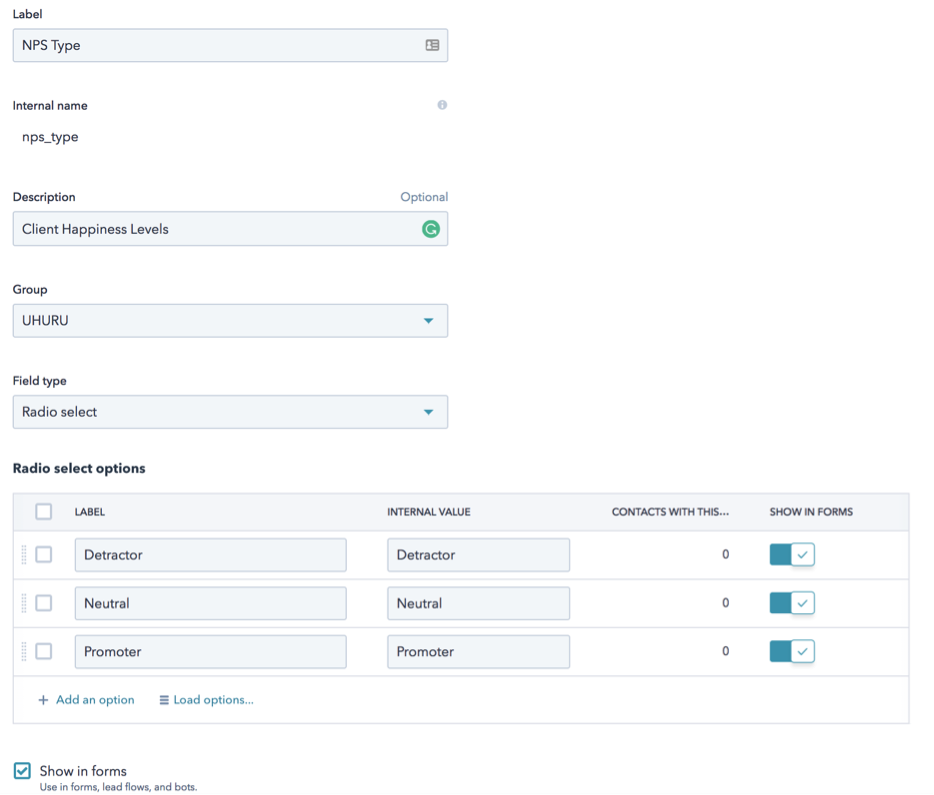
Step 2: Create Two Custom NPS Survey Properties
Go to Contacts –> Contact Settings and create a custom radio select property called NPS Type.
Enter three possible options: Detractor, Neutral, and Promoter.
Next, create a multi-line text property called NPS Feedback.

Step 3: Create an NPS Feedback Form for the NPS Survey
Go to Marketing –> Lead Capture –> Forms and build a simple form with two fields for your post-survey thank-you pages to capture the reason behind someone’s score.

1. Add Email (required) – cookied visitors won’t even see this field.

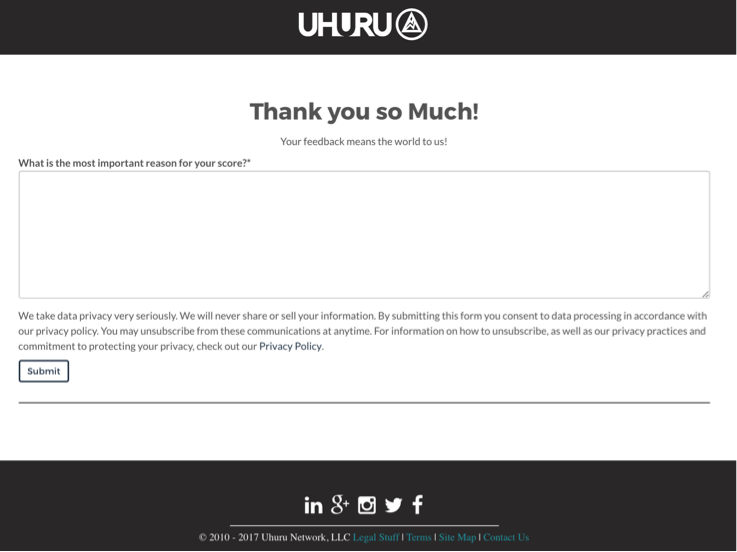
2. Add your NPS Feedback multi-line text field and give it a label that says “What is the most important reason for your score?”

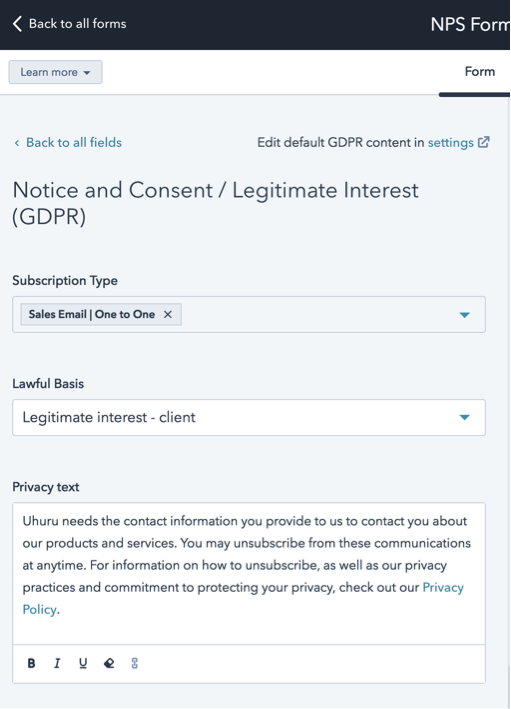
3. Add Notice and Consent / Legitimate Interest (GDPR)
Simple enough.
Step 4: Create 3 HubSpot NPS Thank-You Pages
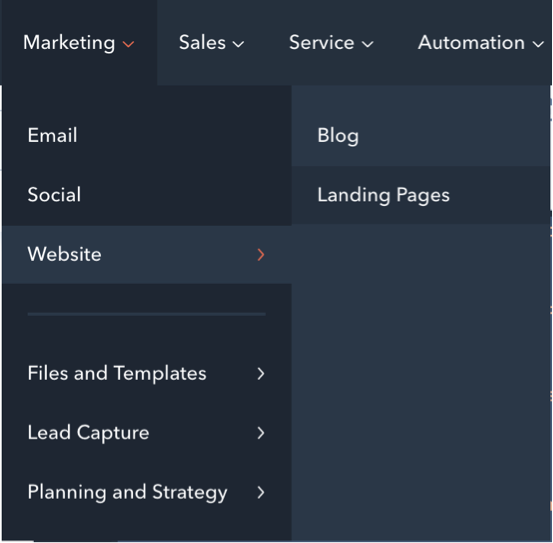
Go to Marketing –> Website –> Landing Pages and create 3 landing pages—one for each type (Detractors, Neutrals, and Promoters):
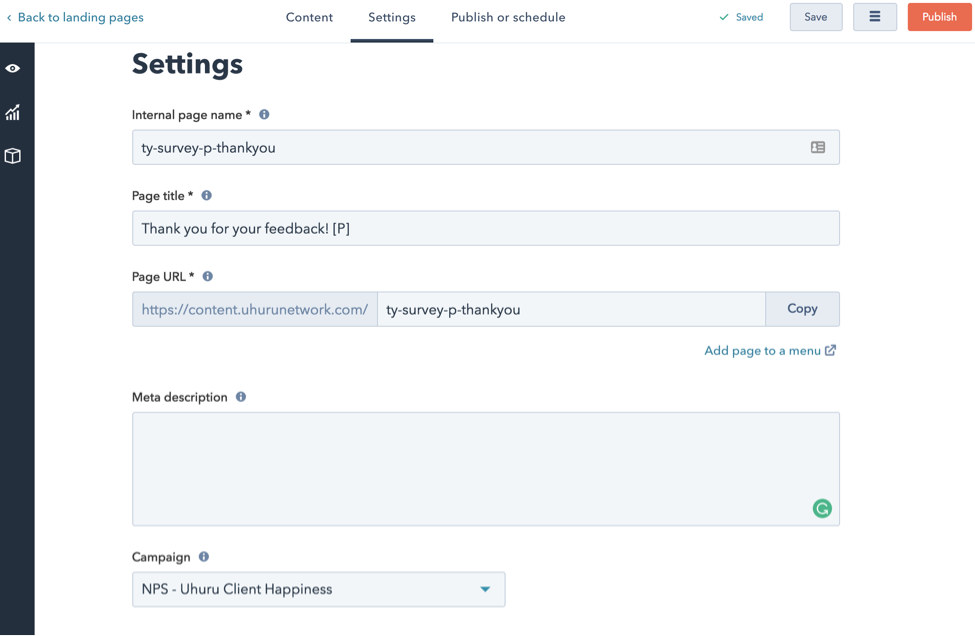
- Build a thank-you page for Promoters (e.g., https://yourdomain.com/ty-survey-p-thanks)
- Build a thank-you page for Neutrals. (e.g., https://yourdomain.com/ty-survey-n-thanks)
- Build a thank-you page for Detractors. (e.g., https://yourdomain.com/ty-survey-d-thanks)
Pro Tip: adding “ty” to the front of your Landing Page URLs will allow you to create Google Analytics to build custom goals for conversion funnel reports and use HubSpot reports to create an NPS report [shown at the end of the steps].
Build the Promoters page first and add the NPS Feedback form to it. Then clone it twice. Change the URL and modify the messaging (if you want). Here’s what it should look like:
Step 5: Create Your NPS Survey Email
We built a HubSpot-ready NPS email template for you. Note, you’ll need to replace the domain name in the top portion of the HTML.
Click here to use our free template HTML file
1. Go to Marketing –> File and Templates –> Design Tools.

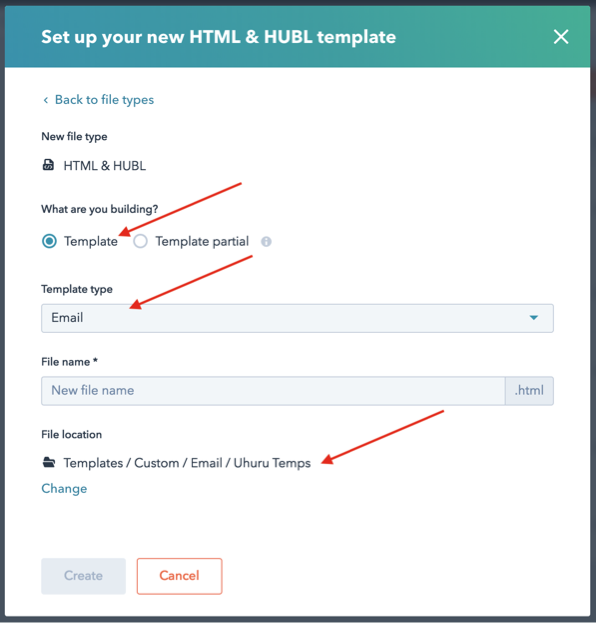
2. Click New File –> HTML & HUBL –> Email –> Create

3. Input the File name as: hubspot-nps-template.html
4. Copy and paste in the HTML code

5. Publish your template
You don’t have to change anything inside the template HTML. It’ll pull in most of your portal’s styles and your logo.
When you create an email using this template, click on Edit Modules in the left sidebar. Here you’ll be able to enter your 3 thank-you page URLs. That’s all you have to do. Of course, you can optionally change the text of the email.
Save your email for automation if you plan to use it in a workflow. Otherwise, add your list and send away!
Step 6: Create a HubSpot Workflow to Assign NPS Property Values

Your NPS type value is going to be set via a HubSpot workflow. Typically the HubSpot Academy recommends creating 3 separate workflows, but you can do it with just one.
1. Create an enrollment trigger on Page View: Contact has visited a URL containing ty-survey

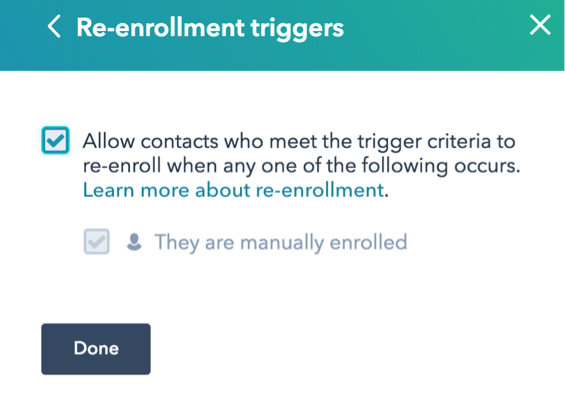
You also want contacts to be able to repeat this workflow since their opinion of you might change over time.
2. Create an If/Then branch on Page View: Contact has visited a URL containing ty-survey-p-thankyou
3. If Yes: Set a contact property NPS Type to Promoter then end the workflow
4. If No: Create an If/Then branch on Page View: Contact has visited URL containing ty-survey-d-thankyou
5. If Yes: Set a contact property NPS Type to Detractor then end the workflow
6. If No: Set a contact property NPS Type to Neutral then end the workflow

Don’t want to collect testimonials? Then skip Step 7. If you do, please proceed.
Step 7: Collect Testimonials from NPS Survey Promoters Automatically
Your NPS survey will find many happy Promoters, now it’s time to collect customer testimonials automatically.
You’ll need to open a dialogue with the happy customers and see if you can collect from them a testimonial or review, which you can then use as social proof to acquire more customers.
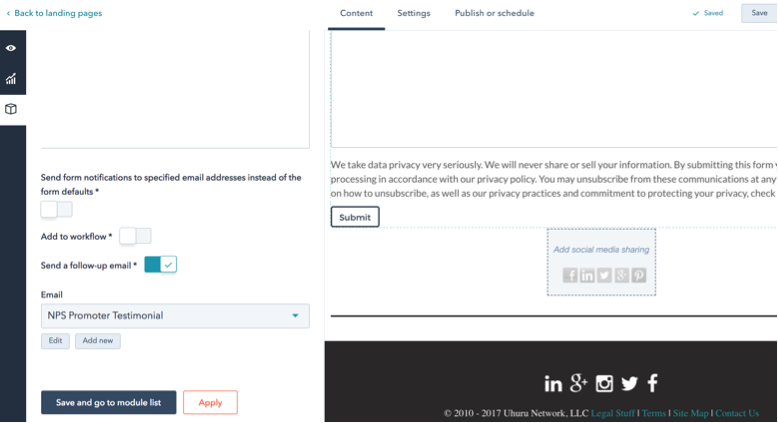
On your NPS Promoter Landing Page, you’ll need to send a follow-up email after the form submission.
1. Go back to the Promoter Landing Page and add an email follow-up
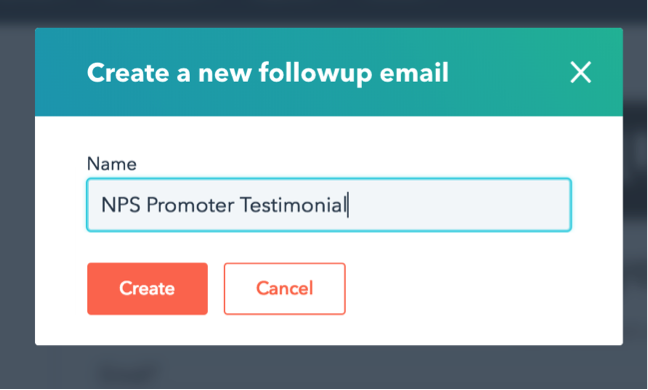
2. Create a new follow-up email
3. Add Follow-up email to NPS Campaign and complete the email settings based on your account settings.

4. Edit the Promoter Email. Feel free to use something similar to ours

5. Have the email sent from the HubSpot owner or sales rep to activate the conversation for customer nurturing

6. Update/Publish Promoter landing page changes
You’re all set.
Pro Tip: Add a notification to the HubSpot owner and sales rep if the feedback is negative. That way the rep can reach out to learn more about the issue and help turn the unhappy client into a Promoter.
Step 8: Send Your NPS Survey Email
It’s up to you when to send your NPS survey email. You can send it as a manual send to a Smart or Static List on a specific date to survey a large set of customers at once, or you can trigger your NPS survey via a workflow.
Send and watch the scores come in.
Calculating Your NPS Score
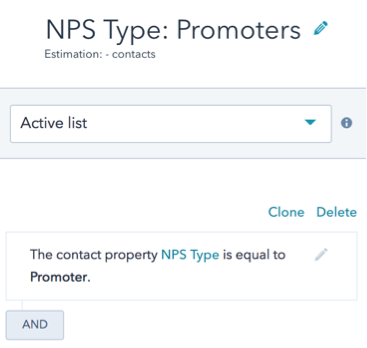
You can calculate your all-time NPS score by creating three Active Lists (Previous called Smart Lists) based on the value of the NPS Type property: Promoters, Detractors, and Neutrals. That’ll give you the NPS Type totals.
- Take the total number of Promoters
- Subtract the total number of Detractors
- Divide by the total number of responders (Promoters, Detractors, and Neutrals)
- Multiply by 100
For example:
- Promoters = 70
- Detractors = 10
- Neutrals = 20
NPS = ((70-10)/100)x100)
NPS = 60
Email NPS Survey Performance Tab
The way we structure thank-you pages allows us to see in each email’s performance tab the NPS score for that discrete survey.
You also have the option to uncheck the “Combine similar links” box to get a per-score breakdown.
If you send your surveys via an automation email, the performance tab will reflect a cumulative score for however long that automation email is in play.
To put a date range on your survey—for example, NPS for Fall 2018—you can simply remove the automation email from the workflow, clone it, and attach the new one (which will have fresh performance stats) to the HubSpot Workflow.
NPS Survey Wrap-Up
Your customers might answer the NPS Survey with a low score, or even a 0. It’s important to view this negative feedback as an opportunity, especially if it happens more than once because it allows you to focus on the customer feedback and make necessary improvements.
That’s the primary reason for asking WHY the customer gave the score they did. That way, you can evaluate the feedback about customers who might pinpoint specific things that you can change to improve their experience with your company.
Of course, not all NPS Surveys will be helpful. There are internet trolls and people who complain about everything, but specific suggestions or observations about issues, poor customer experience, or a bad call with a customer support rep could quickly have a resolution prioritized.
**Net Promoter, Net Promoter System, Net Promoter Score, NPS, and the NPS-related emoticons are registered trademarks of Bain & Company, Inc., Fred Reichheld and Satmetrix Systems, Inc.